Apr 302014
 

This month’s project focus was to make gifts for my parents, who turn 80 this year. Originally I planned to make one art quilt as a gift for both, but then I discovered a UFO that I had started for my dad about 15 years ago. He got something else for a gift that year, as I only managed to get half the top put together before my lack of improvisational experience caught up with me and I couldn’t figure out how to put the rest together without more flying geese units, and I had no more fabric for them.

By the time I pulled it out again I had forgotten whatever rules I was following at the time, and, with some cutting apart of segments and rearranging, I pulled a top together. I had just enough WoW for assembly and not enough to flesh out all the corners to 90degrees. But improv quilts don’t have to be square, so I called it good and sewed on a light blue inner border, using that to fill out the corners first. It still needs one more border. I hope my stash holds something that will work.

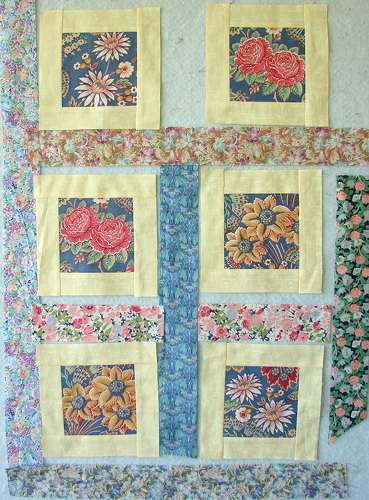
For my mom, I decided to make her a table runner (small projects finish quicker) from the fabrics we made her some napkins with, last Fall. That’s my NewFO for this month, and here’s some of the pieces.

This is not the planned design, just the focus blocks and some of the fabric strips I’m working with. I had in mind a colorwash style background but I don’t think these fabrics will give me the desired effect. I’ll save that idea for some other project. I’m not sure exactly what I will do, something with strips because I have a bunch all cut, but not log cabin.

 April 30, 2014  Posted by at 2:33 pm Quilt Alongs 1 Response »
Mar 312014
 

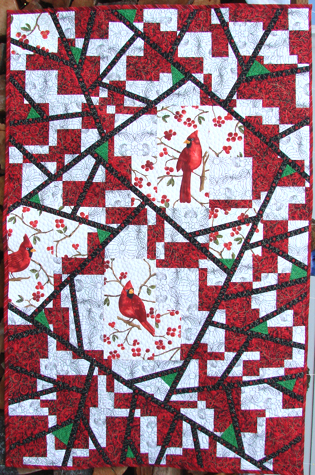
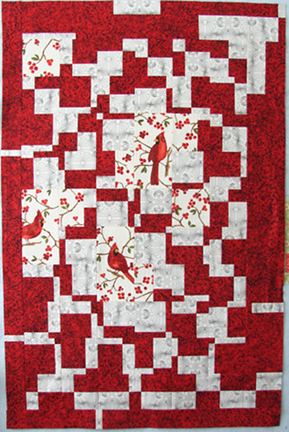
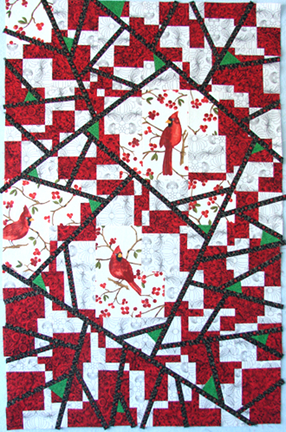
Down to the wire, but it’s FINISHED! I sewed the binding on this morning. Here is “Cardinal Sin” in all it’s glory. (Sort of, darn camera distorted it a bit.)

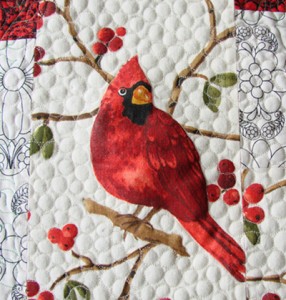
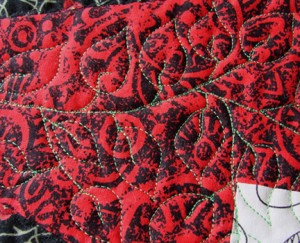
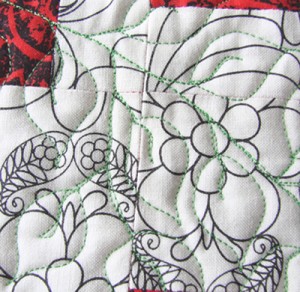
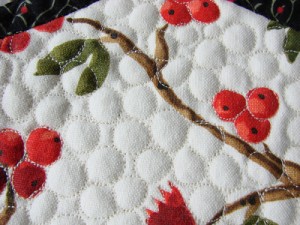
You can read about the construction of this quilt here, here and here. When it came time to quilt it, I chose a leafy branches motif to fill the smaller areas, and added a few along the edges of the bird patches. Then I took inspiration from the berries and used a “pebbles” fill around the birds – except I called it “berries.”

The leafy branches are sewn with green thread, which worked beautifully. It shows enough to see the design, but not enough for my many little “oopsies” to jump out. White thread would have disappeared on the white fabric and stood out too much on the red, and vice verse for red thread. Green was just right. For the “berries” I used an off-white thread that doesn’t show, but you can see the design anyway from the texture of it.

This quilt is finish #3 for the Finish-Along (original post here), and my March finish for the Lovely Year of Finishes, and is my finished quilt for the Tea-Towel Challenge. Hah – three birds with one quilt!

 March 31, 2014  Posted by at 7:47 pm Finish-Along, Quilt Alongs 3 Responses »
Mar 092014
 

The Challenge for this week was to be inspired by something at the grocery store (any grocery store). Well, the challenge is issued on Sunday and I do my weekly grocery shopping on Thursday, so I needed a Plan B right off. I decided to do a Post Office run on Monday and swing by the local small-town grocery and see if I could find inspiration.

Meanwhile, I visualized grocery store shelves and thought about a produce-shelf inspired quilt, but wasn’t sure where my stash of veggie-print fabrics was (I’m in the middle of a massive reorganization of my sewing space). Then I thought about Oreos. I’m not sure why, maybe something I read mentioned Oreos? I drafted an idea for an Oreo quilt based on the rows of Oreos in the package. My perfectionist streak decided I needed to buy a package so I could measure the cookies and get the proportions right.

Monday I made it to the store, and looked at the Oreos, and at a competing brand with a price-tag about half that of the Oreos, and decided I didn’t want to buy either one. I came hope with a bag from a nearby shelf that inspired the piece shown here.

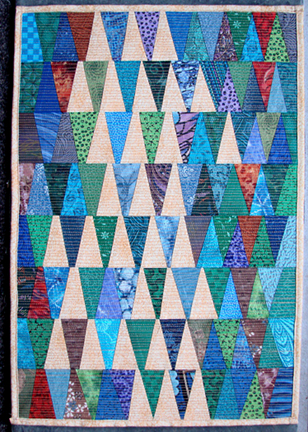
Can you tell what I bought? I neglected to take a photo of the item, so I apologize to anyone in a country that doesn’t sell these. First thing I did was to trace around several sample pieces on a piece of paper. Pretty soon I had my design – improv pieced sharp-angled triangles with most of the points cut off.

I used Wash-away applique sheets from C&T, which I’ve had for awhile but not tried. They are fusible on one side which makes them great for foundation piecing (and you don’t have to pull it off after!). I cut 2” strips the length of two sheets, for a total of 8 rows. Then I dug out a yellow that matched the junk-food item, and went rummaging through my not-so-organized scrap stash and pulled out blues, greens, a few browns and purples. I cut 1 1/2 inch strips from everything.

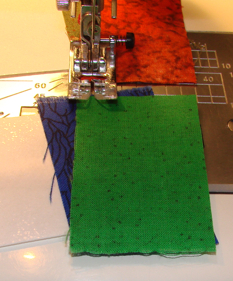
Here’s a shot of the second piece of fabric placed across the strip on an angle.

I used a cut-out shape to check my angle until I had a feel for it, then winged it from there. I alternated the direction of my starting angles so the strips would not all line up the same. Then I had to pay attention to make sure all my junk-food pieces pointed the same direction. (Not that they had to, but I wanted the look.)

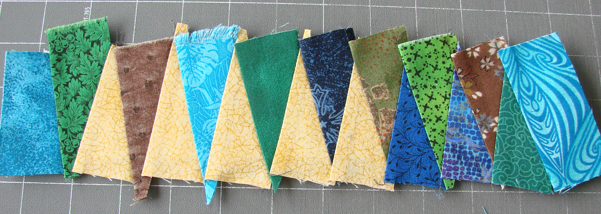
Here’s a finished but untrimmed row:

I trimmed them 1/4 inch from the “paper” and sewed the rows together with a normal 1/4 seam. Then used a LOT of steam to iron the seams over and get them somewhat flat. I used the yellow fabric on the back, and a scrap of cotton batting. I tried the spray-starch basting method someone linked to (sorry I didn’t keep track of the link), which meant more ironing. It held okay, and definitely helped flatten those lumpy seams. I did stitch around the edge of the piece to make sure it would hold before quilting.

Then my inner demon woke up and compelled me to quilt it in straight lines, 1/8 apart. Why on earth would I do that???? Well, the junk-food item has little ridges about that far apart, and I figured it would be easier to run the quilting straight across instead of do just the little yellow triangles, and give it an art-quilt look. Took me days to get that part done.

I took the quick and easy route for the binding, and wrapped the backing around to the front and stitched it down. Done!

“Ode to Junk Food” aka “Bugles”
11 1/4 by 16 3/8, created in the Idaho panhandle.

Now I’m not sure if I have an art quilt, or a placemat.

 March 9, 2014  Posted by at 9:11 am Quilt Alongs 3 Responses »
Feb 282014
 

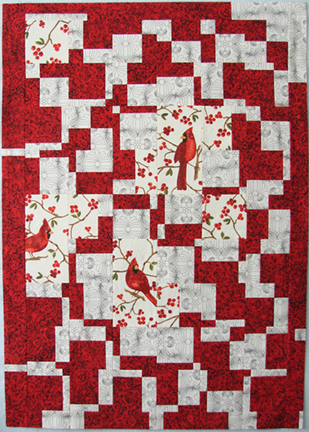
Back in Part 2 I explained the initial creation of this top. I ended that post unhappy with the borders, but unsure how to deal with them. Last week I pulled the top out, put it back on the design wall, and cogitated for awhile. Trim the borders down to 2 inches? Maybe that would do. So I trimmed the top and right side to 2 inches, and cut the bottom up into the bottom row of blocks for a new 2 inch “border.”
Better, but not enough.


After more cogitation, and a bit of wine, I decided to rip the borders off completely. I left the bottom alone, and ripped the sides and top off. Okay, the birds stand out a little bit better now.  But it still needs something. Do I chop the whole thing up, add something to each block, and re-piece? Or would some simple strips to indicate branches do the job?

I was feeling lazy, and chopping the whole thing back into blocks sounded like too much work, so I grabbed some brown strips and laid them across the quilt here and there and stood back to see how it looked. Yeah, not bad. That will do, I think.

Somewhere between there and actually looking for fabric I thought, “the red and whites I used both have black prints, I ought to use black for the branches.” And I dug out about 5 choices, of which I chose one, black with a small green and red floral print on it.


Step one was to cut the top into basic sections, then I added branches one section at a time. I nearly ran out of the chosen black, had to piece some of the strips. The very last short strip ended up pieced from three scraps.

I cut the strips 1 1/4 inches. Any narrower gets hard to sew on, and wider would have created more distortion as they were inserted. I had to do a little trimming to put everything back together, but it’s an improv piece, so who cares? As long as I didn’t lose any birds I was happy.

And I added a few leaves, just to throw a little more color in, here and there. After slicing, I picked corners and replaced them with green before sewing the branches in place. That little bit of color livens it up, but I guess I can’t call it a red and white quilt any more.


Here’s the final top. The birds show up much better and the whole piece has more character.

I guess in the end I cut it up anyway, didn’t I? But this was more an “add sashing” exercise than redo each block. I could have done something like this with bias-type strips appliqued on top, but I felt like piecing it. I don’t know whether it was any faster this way, probably not.

 February 28, 2014  Posted by at 2:52 pm Quilt Alongs 6 Responses »
Feb 232014
 

I started this quilt for Project Quilting’s Across the Universe challenge. As many of my ideas do, the project grew as I worked and I was unable to finish it in one week. It didn’t help that I waited until Tuesday to start, then Thursday we took a day trip, and Friday I spent the morning running errands. Saturday I looked at a project that was going to take all day to quilt, then need a bit of applique, plus finish the edge, try to get photos in the dark, edit photos, write a blogpost, and get everything posted by 10am on Sunday. Since I am also trying to minimize the stress in my life and get plenty of sleep, I called it quits (for now) on this project and moved on.
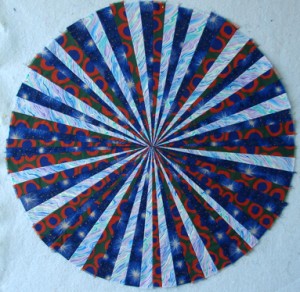
Here’s this quilt’s story so far:
When I first saw the challenge I thought “ah ha, I’ll whip up a patchwork banner for my blog” — after all, the name is a contraction of Quilt Universe, so a banner to go across the top of my page would suit the challenge. But before I even came up with a plan I found a few lines of the Beatles song “Across the Universe” running through my head. “Pools of sorrow, waves of joy, on and on, across the universe.” Eventually it occurred to me to look up the lyrics, and sure enough, I’d remembered it wrong. I had the lines out of order. I debated for about 5 seconds whether to adjust my quilt plan, but I’d already cut fabric, so I said F-k it, this quilt is inspired by MY version of the song. Hence its title – Remix.
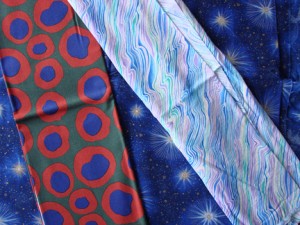
When thinking about how to portray pools of sorrow and waves of joy going on and on across the universe, I realized I’d better use fabric choice to portray the pools, waves, and universe. The universe part was easy to find, then after considering several other possibilities I found the fish-lips fabric for pools of joy. The waves of joy were more difficult. I found the perfect fabric but had already layered and quilted part of it. I finally found another choice, although I would have picked something more colorful if I’d had it.

NOW it occurs to me I could have finished quilting that perfect FQ, then appliqued the other rays over the top, bound it and been done. Why do I always try to do things the hard way?

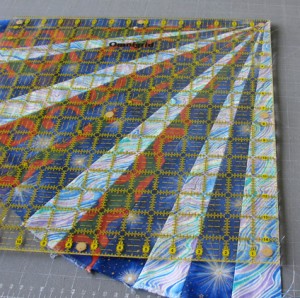
To portray going “on and on” I realized I needed a vanishing-point. Okay, that means wedge shapes with points in the center. (In hindsight, the point part could have been off the side of the quilt somewhere.) Without much further thought, I layered my three fabrics and cut random wedges. Later I wished I had made them wider – it would have saved several steps in the sewing process. Not to mention a little less fabric pile-up in the seams.

I didn’t stop to think about overall size either. My sorrow and joy fabrics were about 18 inches wide, so I made the wedges 18 inches long. Easy to cut. Not so easy to sew, because it turned out I needed a lot of wedges. I even had a Plan B in case I ran short of wedges (having cut up all my joy and sorrow fabric) but didn’t need it. In fact, I have some wedges left over.
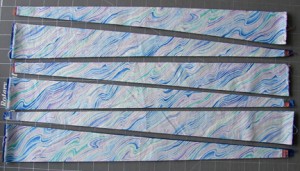
 

I decided after sewing two wedges together that I needed to trim them a little bit if I was going to have points in the middle instead of a hole with ragged edges. I should have cut the original wedges with a narrow end a bit less than half an inch, but my carefree cutting style wasn’t that careful. So I trimmed them and then sewed the double units together to make 4-wedge units, then those into 8-wedge units. By then I already had a seam pile-up problem, but what was there to do but soldier on? After some careful trimming, that is.
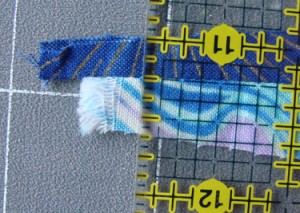
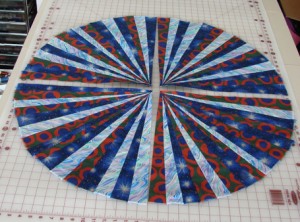


At that point I laid them out on my big table to see if I had enough to make a circle. Yup – and then some. I trimmed a little bit here and there, being careful not to trim too much. I also made sure the future seams did not have the same fabric on both sides. Then I sewed the 8s together into four quarter-circle segments.


By then there was some serious steam ironing going on, and some trimming of excess fabric on the backs of the points, but it still built up. I trimmed each section to just over 90degrees, using my biggest square ruler. Then sewed two quarter sections together so I had two halves.


Now I made sure each half had a straight line for the last seam. Here’s where I screwed up a hair – I trimmed the center too close. I don’t know if you can see it but there is a bit of “horizon line” in the very center.
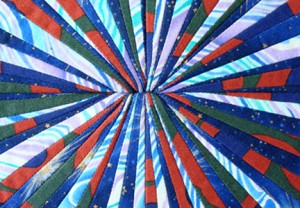
The center also has a dense lump of many layers of fabric. I’m surprised my sewing machine even stitched through it all. And it would have looked better to have the points end a hair shy of the very center than get cut off by a hair. Did I mention I ironed all the seams open? I find that usually works well when you have many points coming together in the middle. But it isn’t enough to deal with however many seams this thing has in the middle! After that last seam I couldn’t open the center at all, steam or no steam.

I did get this portion spray-basted to batting with a layer of interfacing behind it. Next up is add the background around it. After quilting I will add a ring around the rays to cover the raw edges, and it still needs a backing. That was too much to face on Saturday. Now I’m working on a few other projects that I want to finish before the end of the month.
 February 23, 2014  Posted by at 12:55 pm Quilt Alongs 4 Responses »
Feb 092014
 

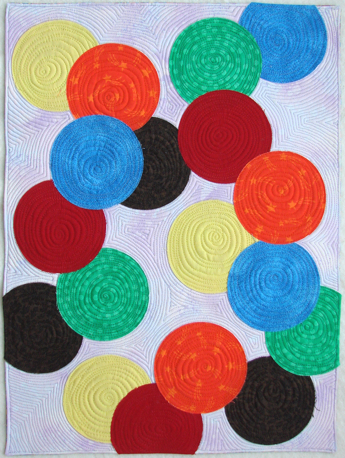
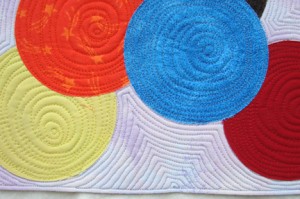
“SWEET SPOTS”

  (14×19 inches)
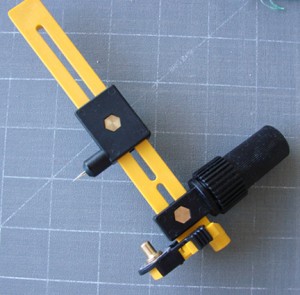
This little beauty was inspired by M&Ms. When I read the Project Quilting challenge for this week – Sweet Treats – I mentally ran through different candies until I got to M&Ms. Ah, I thought, those are colorful. And I have this nifty circle cutter gadget.

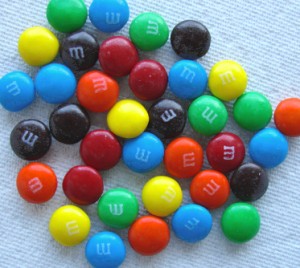
First step – go to the store and buy some M&Ms.

  (the dark brown ones look black, don’t they?)

I needed them in my hand (not in my mouth) to pick fabrics with matching colors. As you can see (above), I did not stick to solids, partly because my solid stash is pitiful, and partly because I like the texture a print can bring to the party. For background I choose a light lilac print because there is no purple in the M&M color selection, which helps the contrast. And for the back I found a brightly colored circle print – perfect!

Shape and color to match M&Ms were as far as I went with the actual candy. I thought about how to use quilting to show the shape and decided to heck with it, I don’t have that much thread selection. I suppose fabric paint could have added shadow and highlights, and I have paint, but no place set up to work on messy stuff. And only a few days to get this done! So I put the M&Ms aside (okay, I confess, I ate them), and let the shapes inspire my quilting efforts.

The circles begged for spirals, but I knew I couldn’t possibly do a nice even spiral, so I intentionally combined a spiral with a hairball and let some of the lines cross for a slightly wonky look on the circles. Then I threw caution to the wind and echoed around them in the background – about 1/8th inch apart. Don’t look too close – Diane Gaudynski I ain’t! But it still turned out pretty good, even though my lilac thread looks grey in the finished quilt.

Stay tuned to this channel – I’m working on a tutorial on this quilt.

 February 9, 2014  Posted by at 10:29 am Quilt Alongs No Responses »
Jan 312014
 

Here’s an update on Cardinal Sin, my Tea Towel challenge quilt. It’s also my January new start for the Newfo Challenge over at Cat Patches.

It started with a cardinal print tea towel and a black-on-red and a black-on-white print [shown here]. I used the two fabrics to make a variety of off-beat four patches using Joe Cunningham’s Fantasy Four Patch process I learned in his Craftsy class. The blocks will all finish 6 inches square.

Once I had the blocks made, I tackled the towel. I eventually decided to cut 6 1/2 by 12 1/2 inch pieces around the birds (which were too big for 6 1/2 by 6 1/2). From the rest I cut two 6 1/2 inch squares, and then cut the bigger scraps into pieces I could combine with leftover red and white scraps for a few more 6 1/2 inch squares.

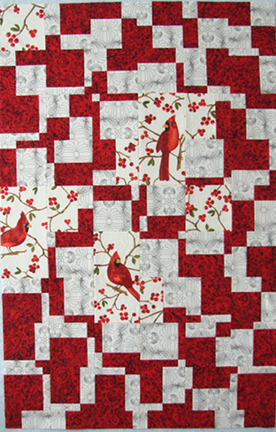
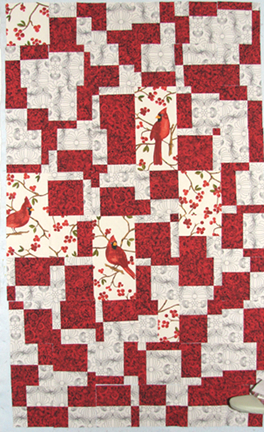
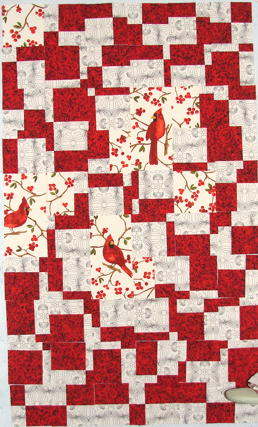
I started my layout with the bird pieces, then started fitting the four-patches around them. I thought placing as much red as possible around the birds would frame them, but when I stood across the room and looked at it from a distance (and without my glasses), the birds got lost in all that red.

Time to rearrange things. This time I put as much white as I could around the birds, including the other dish-towel pieces. Much better.

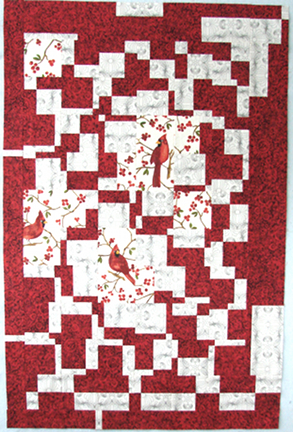
On to the border. I had a few ends of pieced strips, and not quite a yard of red to play with. I liked my border until I took pictures. My poor birds get lost again in the final quilt top. That’s what I get for rushing to get ‘er done. I didn’t put the border pieces on the design wall and stand back for a good look before sewing it all on. Now, I did do a little of that, but not from across the room and I wasn’t paying attention to the birds. I was focused on how the border looked to the overall quilt. Which I still think is fine (after getting rid of most of that big white splotch on the lower right), but overall I like the unbordered version better.
I’m going to let it sit for a bit while I decide what to do with it. I might cut it down to a more reasonable size for the birds. Then, of course, I’ll have some leftover bits to make something else with.
 January 31, 2014  Posted by at 7:36 pm Quilt Alongs 1 Response »
Jan 262014
 

[read Part One here] [read Part Three here]

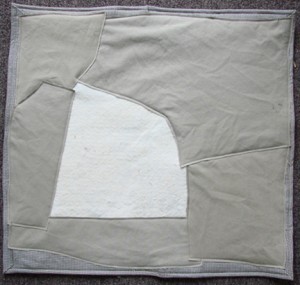
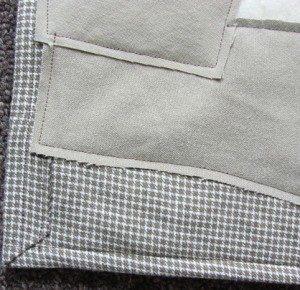
To get this quilt done quickly I didn’t waste any time with careful piecing. In fact, there’s really no piecing at all. I did need to piece the backing and the background, but I simply laid the pieces down and straight-stitched the edges, backing first. So, backing on first, stitch edges, then wrap the excess around to the front and stitch down. Next, place the background pieces down, covering the faux border edges but letting a little bit show. And stitch the edges. You can see an area that is not covered yet.detail of corner:
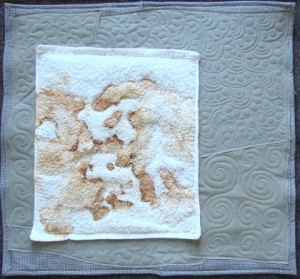
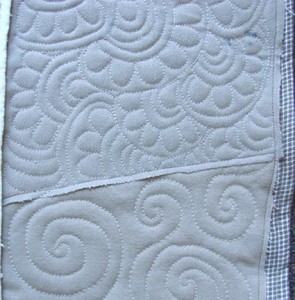
Next I placed the rusty washcloth in place and stitched the edges. Step two was free-motion quilting the piece. If I’d been smart I would have done the background before adding the washcloth, but I didn’t. I kept the quilting on the washcloth to a minimum because of the rust and because my foot didn’t clear the little loops of the cloth well. I went around the edges of the rusted areas, more or less.
details:


 January 26, 2014  Posted by at 1:25 pm Quilt Alongs No Responses »
Jan 262014
 

[read Part two here] [read Part three here]

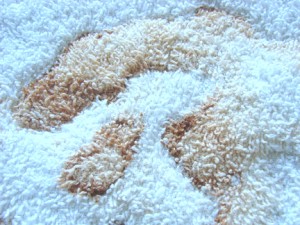
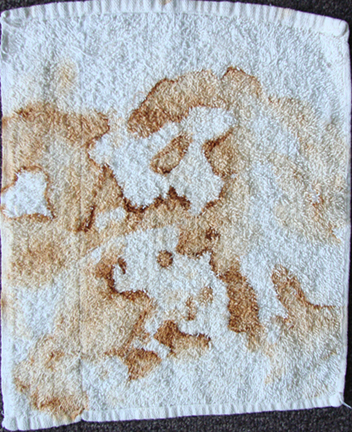
Last fall my sister, a fellow quilter, came for a visit and we did some rust dyeing. Our first attempt did not turn out very well so we tried again. The second time we worked a bit harder to keep the fabric in contact with our rusty items by adding some towel padding and binding strips torn from old sheets. One small towel (formerly used by my husband to wash his motorcycles) that I used to pad a rusty spade picked up a rust pattern I liked better than any on the fabric!

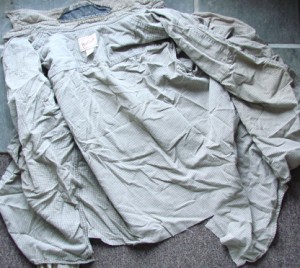
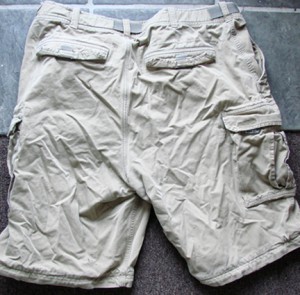
So when I mulled my options for the Upcycle challenge I reached for my rusty wash-towel first, then tried to find things to go with it. Unearthing the bin holding old clothing, I found a pair of khaki shorts and a checked shirt of my son’s (I hope those shorts were outgrown and not here for mending). The shirt had a piece already cut from the tails, but I don’t remember what project I used it in.

I even found a scrap of old acrylic blanket to use for batting. My mom gave me the blanket many years ago and I used half of it for a design wall until we moved and I acquired a bigger wall. The other half had been chewed by squirrels when they took the blanket camping, so this piece was all I salvaged from the chewed half.

Still looking for something not fabric, I dug out a jigsaw puzzle that was so horrible to do that I could not inflict it on anyone else and put it in my art-supplies bin. Also some paperclips and assorted odds and ends.

 January 26, 2014  Posted by at 1:16 pm Quilt Alongs No Responses »
Dec 312013
 

As the old year draws to a close I start to think about the year to come even though I haven’t written a “year in review” post yet. That will come, meanwhile, on to dreaming – how many quilts can I finish in 2014? I managed 16 in 2013, but I think 14 in 2014 might be a saner target.

I sat down and listed what I wanted to get done before garden season starts (in about three months), and quickly listed 9 quilts either in progress or planned. As if that weren’t too many already, then I went cruising for sew-alongs or BOMs to join. Am I nuts? Yes, most assuredly.

I found two mysteries I am eyeing –
New Years Day Mystery at About.com  (I’ll use scraps for this one, if I do it.)
And a Pat Sloan block of the month mystery at FreeQuiltPatterns

Then I found a lovely garden themed block of the month at QuiltArtDesigns. I can’t resist this one!

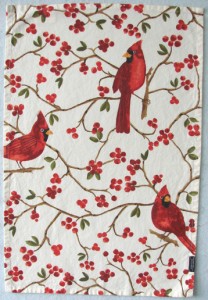
And last but not least, a tea towel challenge! I’ve been wanting to try this since my sister participated in one last year, then my mom gave me this towel for Christmas:

Isn’t that too nice to use to dry dishes or wrap up lettuce? (My usual use for what I’ve always called dish towels.)
So I’m going to join the Tea Towel Challenge at Sophie Junction.

I need to go order some clones to help me out around here.

 December 31, 2013  Posted by at 2:20 pm Quilt Alongs No Responses »