Abby

I've been quilting since the late 1980s - long enough ago that I can't remember the exact year. I'm fond of starting new projects and not so good at finishing them. Last time I counted my UFOs I had 85, before I found a couple more bins I'd forgotten about. My life's goal is to finish them all, one way or another.

Feb 092014
 

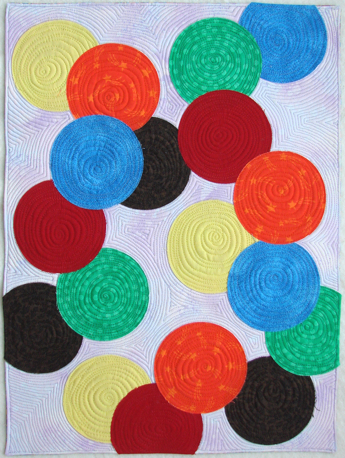
“SWEET SPOTS”

  (14×19 inches)
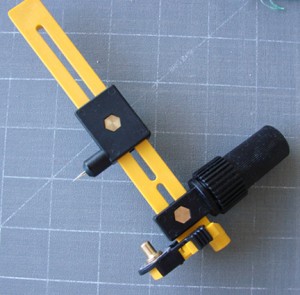
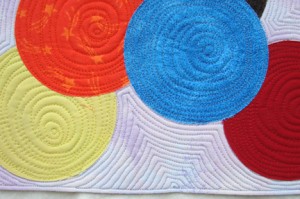
This little beauty was inspired by M&Ms. When I read the Project Quilting challenge for this week – Sweet Treats – I mentally ran through different candies until I got to M&Ms. Ah, I thought, those are colorful. And I have this nifty circle cutter gadget.

First step – go to the store and buy some M&Ms.
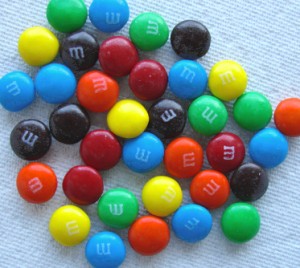
  (the dark brown ones look black, don’t they?)

I needed them in my hand (not in my mouth) to pick fabrics with matching colors. As you can see (above), I did not stick to solids, partly because my solid stash is pitiful, and partly because I like the texture a print can bring to the party. For background I choose a light lilac print because there is no purple in the M&M color selection, which helps the contrast. And for the back I found a brightly colored circle print – perfect!

Shape and color to match M&Ms were as far as I went with the actual candy. I thought about how to use quilting to show the shape and decided to heck with it, I don’t have that much thread selection. I suppose fabric paint could have added shadow and highlights, and I have paint, but no place set up to work on messy stuff. And only a few days to get this done! So I put the M&Ms aside (okay, I confess, I ate them), and let the shapes inspire my quilting efforts.

The circles begged for spirals, but I knew I couldn’t possibly do a nice even spiral, so I intentionally combined a spiral with a hairball and let some of the lines cross for a slightly wonky look on the circles. Then I threw caution to the wind and echoed around them in the background – about 1/8th inch apart. Don’t look too close – Diane Gaudynski I ain’t! But it still turned out pretty good, even though my lilac thread looks grey in the finished quilt.

Stay tuned to this channel – I’m working on a tutorial on this quilt.

 February 9, 2014  Posted by at 10:29 am Quilt Alongs No Responses »
Feb 022014
 

I’ve been doing an inventory of my UFOs. I haven’t finished and I am already over my count of two years ago, and I finished 23 during that time! Can’t resist starting new ones, I guess. I am using a very broad definition of UFO – if it is a defined project and at least one step has been taken, and it isn’t finished, it counts. That is still not 100% accurate because sometimes I count a box-lot of something that might end up being two projects, but if it feels like a project I count it. Maybe someday I’ll break that down into narrower categories, but for now I inventory UFOs, finished quilts, and fabric.

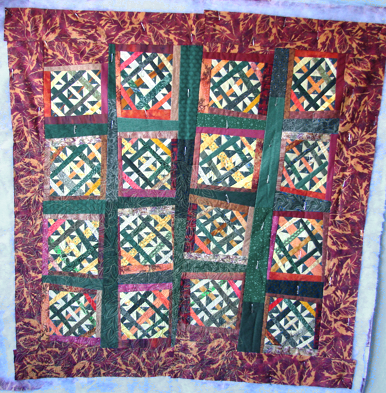
While rummaging I found this unfinished thing from over ten years ago. I didn’t get the color balance quite right in this pic, there’s no purple in it!

It’s about 1/3 quilted, and if I remember right, I quit working on it after the arm broke off of my quilting foot. You know, the part that makes it bounce up and down? A lot of quilters now bend or cut that arm intentionally so the foot skims instead of bouncing, but my old Pfaff does not quilt well on skim. If I try to do circles it skips stitches along one side. I suspect the needle gets pulled too far to the side for the hook to catch the thread and pull it around the bobbin.

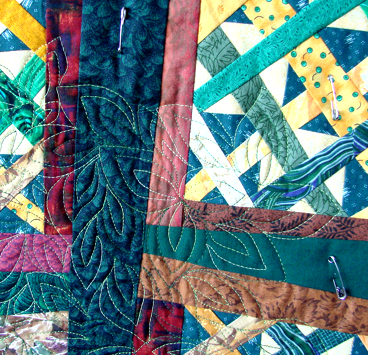
But my Janome is going fine (knock on wood!!) and I’m in free-motion mode and I want something to finish that I don’t have to obsess over the quilting. I’m sure the quilting I’m doing now is at least equal to the quilting I was doing then, and it’s an easy overall pattern. You may be able to see it in this photo:

This quilt started life as a pile of green and yellow 9-patches. I had made them for the border of a full-size quilt, then decided they were too bright for the center and did something else for the border. Then, of course, I had all these leftover 9-patches. I made a nap-size quilt with some, which I gave to my mom for her yellow couch. And I still had some blocks left. I think the idea to insert strips came to me after a class with Diane Hire, where we inserted strips into big 4-patches. Yes, I probably got a little carried away with the inserts, I tend to do that.

The blocks were then wonky enough to beg for a wonky setting. I wish now I’d used more green around the outside, not just the inner sashing, but that’s what I had in my scrap pile. My stash was a lot smaller in those days, lol. The top looks crooked partly because it is (I will trim after quilting) and partly because only one quadrant of it is quilted (lower left in the photo up top).

Anyway, this is my planned finish for the Lovely Year of Finishes challenge, for February.

 February 2, 2014  Posted by at 2:41 pm Finish-Along 1 Response »
Jan 312014
 

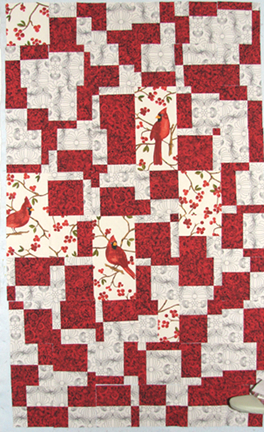
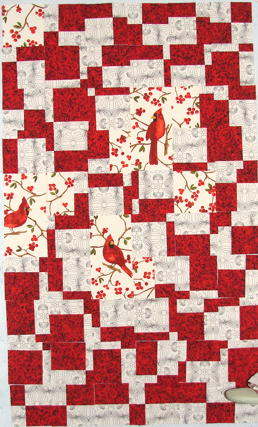
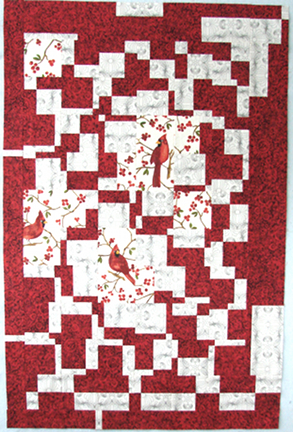
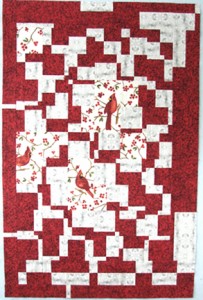
Here’s an update on Cardinal Sin, my Tea Towel challenge quilt. It’s also my January new start for the Newfo Challenge over at Cat Patches.
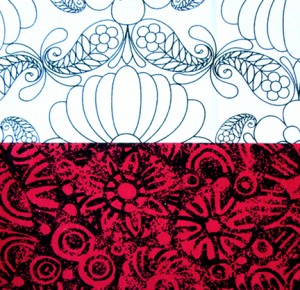
It started with a cardinal print tea towel and a black-on-red and a black-on-white print [shown here]. I used the two fabrics to make a variety of off-beat four patches using Joe Cunningham’s Fantasy Four Patch process I learned in his Craftsy class. The blocks will all finish 6 inches square.

Once I had the blocks made, I tackled the towel. I eventually decided to cut 6 1/2 by 12 1/2 inch pieces around the birds (which were too big for 6 1/2 by 6 1/2). From the rest I cut two 6 1/2 inch squares, and then cut the bigger scraps into pieces I could combine with leftover red and white scraps for a few more 6 1/2 inch squares.

I started my layout with the bird pieces, then started fitting the four-patches around them. I thought placing as much red as possible around the birds would frame them, but when I stood across the room and looked at it from a distance (and without my glasses), the birds got lost in all that red.

Time to rearrange things. This time I put as much white as I could around the birds, including the other dish-towel pieces. Much better.

On to the border. I had a few ends of pieced strips, and not quite a yard of red to play with. I liked my border until I took pictures. My poor birds get lost again in the final quilt top. That’s what I get for rushing to get ‘er done. I didn’t put the border pieces on the design wall and stand back for a good look before sewing it all on. Now, I did do a little of that, but not from across the room and I wasn’t paying attention to the birds. I was focused on how the border looked to the overall quilt. Which I still think is fine (after getting rid of most of that big white splotch on the lower right), but overall I like the unbordered version better.
I’m going to let it sit for a bit while I decide what to do with it. I might cut it down to a more reasonable size for the birds. Then, of course, I’ll have some leftover bits to make something else with.

 January 31, 2014  Posted by at 7:36 pm Quilt Alongs 1 Response »
Jan 282014
 

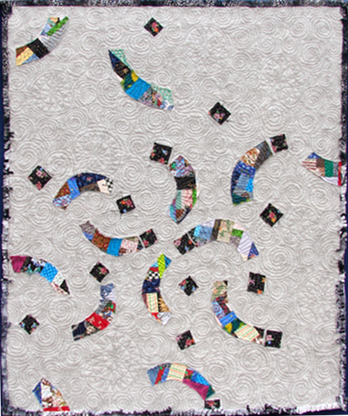
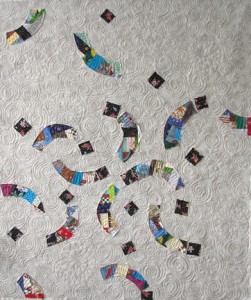
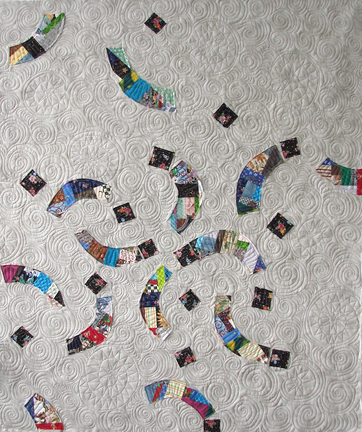
Well, I did it! Finished this lovely quilt which I named “Divorce: DWR Deconstructed.” This one was my goal finish for The Year of Lovely Finishes. It is also finish #1 for the Finish-Along (original post here).

I dithered for awhile over how to do the binding. In the end I trimmed the batting away, to the edge of the top fabric, then trimmed the backing to about an inch, to an inch and a half, maybe a tad more. I used scissors and judged the width by eye, letting it be as wonky as it wanted.

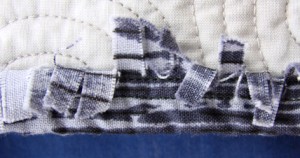
I folded the back to the front, leaving the raw edge out, and stitched about 3/8 of an inch from the edge to hold it in place. Then, the tedious part, I fringed the exposed raw edge with scissors. I had hoped it would fray in the wash but it didn’t. Oh well, the fringe looks ragged enough as is.

 January 28, 2014  Posted by at 8:06 pm Finish-Along 7 Responses »
Jan 262014
 

[read Part one here] [read Part two here]

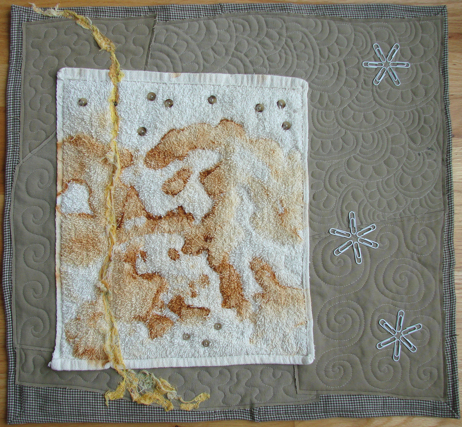
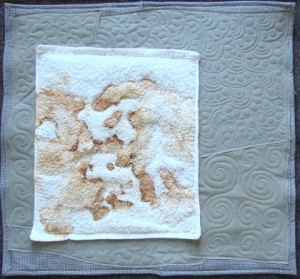
Finished! This little beauty ended up about 20.5 inches by 22.5 inches.

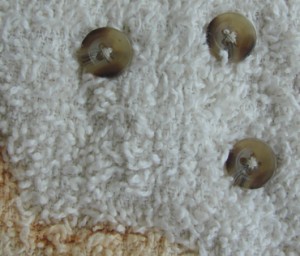
After quilting the piece I played around with embellishment ideas. First was the buttons I had cut off the shirt, those went on the empty areas of the washcloth because they would have blended in with the tan background.

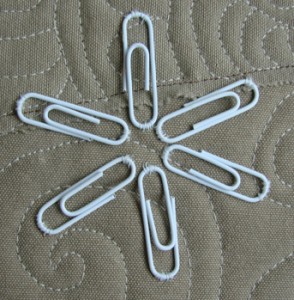
Next up was pieces from the old jigsaw puzzle. I pulled out the white ones and arranged some in a circle. A little fiddling about and I thought “that looks a little like a snowflake, except it’s 8 pointed.” So I reduced them to 6 points and stepped back. Hmmm. They didn’t stand out much against the tan background. Oh, they aren’t really white, are they? Maybe the paperclips would be better. So I ditched the puzzle pieces in favor of paperclip snowflakes (the clips are white, I picked them out of a batch of colored paperclips).

Once I had snow on my mind I looked at that rusty cloth and thought “don’t eat yellow snow.” Which reminded me of a story I heard back in high-school when I was on the cross-country ski team. (Don’t be impressed, it wasn’t much of a team.) Seems at a recent race, one skier had gained advantage over a competitor by scooping up a handful of yellow snow and eating it front of the competitor, who immediately got sick. But it wasn’t what it looked like – a friend had poured orange soda on the snow a few minutes earlier.

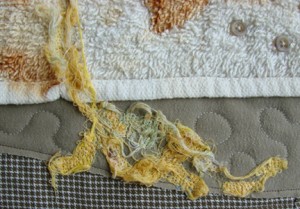
With yellow snow on my mind, I added the yellow “stream,” made with loose threads cut off washed fabric (you know, the part that gets all tangled up in the washer and dryer). The stream also covered up a thread defect in the washcloth.

So that’s my little art piece, all upcycled material except the thread used to sew it. Titled, as you might have guessed already –

Don’t Eat Yellow Snow

 January 26, 2014  Posted by at 1:35 pm Uncategorized No Responses »
Jan 262014
 

[read Part One here] [read Part Three here]

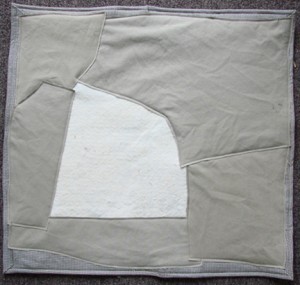
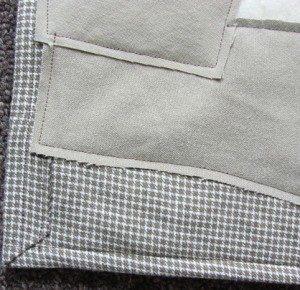
To get this quilt done quickly I didn’t waste any time with careful piecing. In fact, there’s really no piecing at all. I did need to piece the backing and the background, but I simply laid the pieces down and straight-stitched the edges, backing first. So, backing on first, stitch edges, then wrap the excess around to the front and stitch down. Next, place the background pieces down, covering the faux border edges but letting a little bit show. And stitch the edges. You can see an area that is not covered yet.detail of corner:

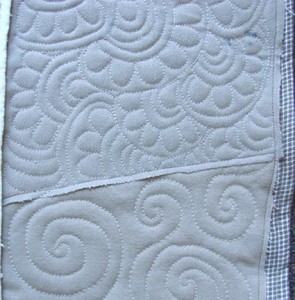
Next I placed the rusty washcloth in place and stitched the edges. Step two was free-motion quilting the piece. If I’d been smart I would have done the background before adding the washcloth, but I didn’t. I kept the quilting on the washcloth to a minimum because of the rust and because my foot didn’t clear the little loops of the cloth well. I went around the edges of the rusted areas, more or less.
details:


 January 26, 2014  Posted by at 1:25 pm Quilt Alongs No Responses »
Jan 262014
 

[read Part two here] [read Part three here]

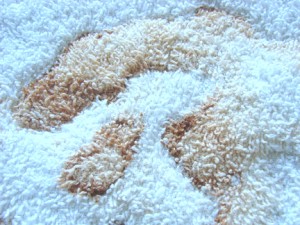
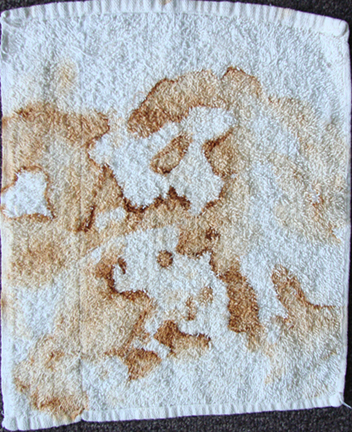
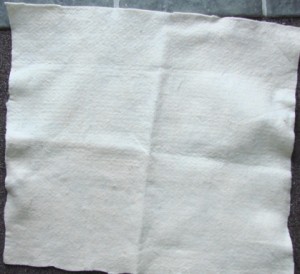
Last fall my sister, a fellow quilter, came for a visit and we did some rust dyeing. Our first attempt did not turn out very well so we tried again. The second time we worked a bit harder to keep the fabric in contact with our rusty items by adding some towel padding and binding strips torn from old sheets. One small towel (formerly used by my husband to wash his motorcycles) that I used to pad a rusty spade picked up a rust pattern I liked better than any on the fabric!

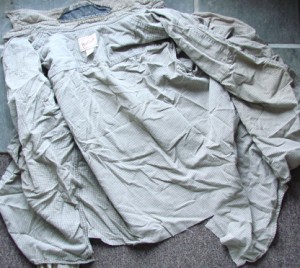
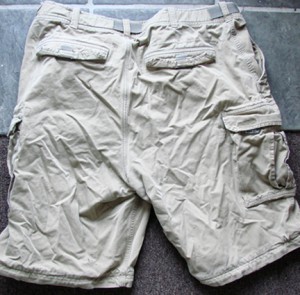
So when I mulled my options for the Upcycle challenge I reached for my rusty wash-towel first, then tried to find things to go with it. Unearthing the bin holding old clothing, I found a pair of khaki shorts and a checked shirt of my son’s (I hope those shorts were outgrown and not here for mending). The shirt had a piece already cut from the tails, but I don’t remember what project I used it in.

I even found a scrap of old acrylic blanket to use for batting. My mom gave me the blanket many years ago and I used half of it for a design wall until we moved and I acquired a bigger wall. The other half had been chewed by squirrels when they took the blanket camping, so this piece was all I salvaged from the chewed half.

Still looking for something not fabric, I dug out a jigsaw puzzle that was so horrible to do that I could not inflict it on anyone else and put it in my art-supplies bin. Also some paperclips and assorted odds and ends.

 January 26, 2014  Posted by at 1:16 pm Quilt Alongs No Responses »
Jan 142014
 

I have eight quilts I want to finish this quarter. Which might be a few more than I can squeeze in, but I don’t know yet which one[s] I won’t get to. I want to do them all! Here’s my list for the Finish-Along, first quarter of 2014.

1) “Divorce” – I have to start with an easy one, this needs binding, label, and sleeve. I might have it done this week, if my knee recovers enough so I can run the sewing machine. (Wallhanging)
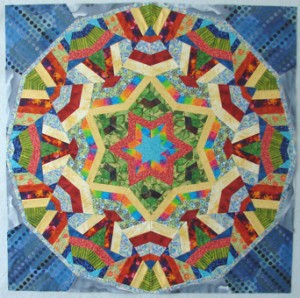
2) “Kally” – That’s my working name for this Kaleidoscope quilt done Ricky Tim’s way, all set for some serious free-motion quilting, as soon as I get back in the groove with some practice quilts. (Wallhanging)
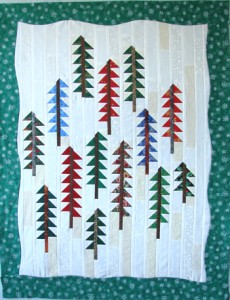
3) “Snowy Trees” – Another waiting for quilting. I’ve got some snowflake stencils I want to try in the white areas on this one. After a practice quilt or two. (Wallhanging)
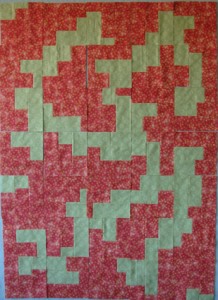
4) “Twisted Sister” – Made following a Craftsy class by Joe Cunningham, this is my version of his Crazy Sisters process. I’ve started quilting, it needs a little bit of free-motion work too. (Crib size) [I need a more recent pic, this was all I could find]
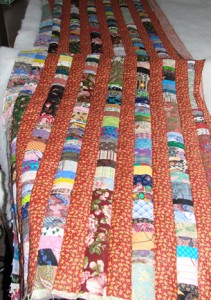
5) “Stripes” – A QAYG quilt made by sewing strips directly to the backing and batting, which, I’ve discovered, is boring as hell. I may have to pay myself in chocolate to finish this one. Why did I make it twin size??
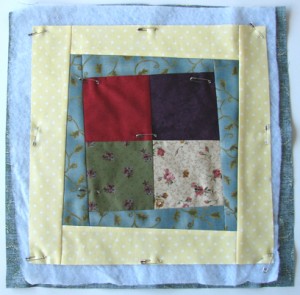
6) QAYG blocks #1 – Layered and basted blocks, ready for some free-motion practice. I expect to get these quilted, but whether I’ll get them assembled into a finished quilt by the end of the quarter remains to be seen. (Twin, I think.)
7) QAYG blocks #2 – Another set of basted blocks waiting for free-motion quilting, which will be used as practice before I tackle numbers 1, 2, 3, and 8. (Another twin, if I calculated right.)
8) “Cardinal Sin” – Another top made from Joe’s Craftsy class (there’s more on my “next up” list, I loved this class). I included a cardinal-print tea towel in the quilt to spice it up a little, but I’m feeling the end result is too big for the birds. I may cut it down a bit, but have not decided how much. I’d put it aside longer but I joined a tea-towel challenge and this is my challenge quilt. It needs to be finished by the end of March. (Wallhanging.)
So there you have it. Eight quilts in two and a half months. I’d better get to work.

 January 14, 2014  Posted by at 8:58 pm Finish-Along 1 Response »
Jan 112014
 

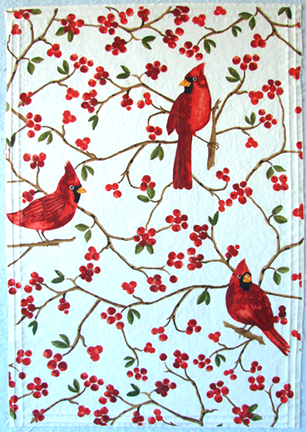
For Christmas my mom gave me a lovely cardinal tea towel (or, as I’ve always called them, dish towel). I thought it was too nice to use. The towels I use get faded, worn, and stained. This one deserved better. My sister had done a tea-towel challenge last year over at 15minutesofplay  and it looked like fun, so using this towel in a quilt was on my mind when I ran across a new challenge.

Here I show the towel after I opened the hem – you’ll notice the bird on the edge has no tail (poor thing). (It’s not bluish at the bottom, that’s poor lighting on my design wall thanks to my husband stacking firewood so it blocks the bottom third of the window.)

About the same time I decided to do the challenge, I watched a Craftsy class by Joe Cunningham on Pattern-free quilt making. For the second class project I thought I’d use black and white, but when I went “shopping” in my stash, I found this red with black print and it jumped out at me. And I had an idea – why not combine the two projects? Add my tea-towel to Joe’s process and see what I come up with. Here are my two fabrics:

(More on the quilt next month – although you can get a sneak preview in my post for the Finish-along, coming soon.)

 January 11, 2014  Posted by at 7:43 pm Uncategorized 2 Responses »
Jan 102014
 

Here’s my intended finish for January, to take part in the Lovely Year of Finishes over at Fiber of All Sorts blog.

I started this quilt to see if I could finish in five days. I might have, if I hadn’t run into machine issues that kept me from being able to machine quilt it. Out of three sewing machines, I had none I could use. One functioned, but after a year of struggle I’ve admitted I will never be able to control the speed on it, at least not enough for free-motion work. I debated using it anyway, but it was set up with a walking foot and thread for another project I still want to finish.

Another, a new-to-me Janome, came with the wrong darning foot (that’s what you get when you buy used on Ebay). A month later I’m still trying to get a free-motion foot that fits from my local (brand new) dealer. Good thing I bought the right darning foot online. Not that I’ve used it, having been side-tracked by shiny object syndrome. I made another new top (watch for a post on that soon) instead of quilting.

Eventually I cajoled my trusty old Pfaff into working well enough (it hadn’t been sounding right) to do the quilting on this quickie project. I had one tension issue near the end, when the machine suddenly had no top tension. None. I had to rip out a stretch of quilting, something I never do! It was that bad (but came out easy enough). Rethreading took care of the problem but the poor dear is now headed for the machine-doctor.

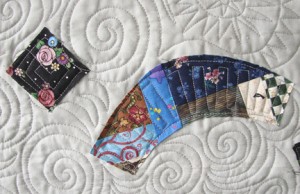
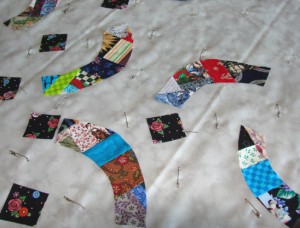
I call this quilt “Divorce” because it’s a de-constructed double wedding ring. The pieces are raw-edge applique the slap-dash way: cut ‘em out freehand and stick ‘em down with a glue-stick. The quilting holds them down. The arcs were cut from pre-pieced scraps that I happened to have lying around – which qualifies this quilt for UFO status even though it’s of recent vintage.


It only needs binding and a sleeve and label to be finished, but since this month is already a third over, I figured this one was my best bet to actually get something done. Everything else needs quilting.

 January 10, 2014  Posted by at 2:03 pm Finish-Along No Responses »