I started this quilt for Project Quilting’s Across the Universe challenge. As many of my ideas do, the project grew as I worked and I was unable to finish it in one week. It didn’t help that I waited until Tuesday to start, then Thursday we took a day trip, and Friday I spent the morning running errands. Saturday I looked at a project that was going to take all day to quilt, then need a bit of applique, plus finish the edge, try to get photos in the dark, edit photos, write a blogpost, and get everything posted by 10am on Sunday. Since I am also trying to minimize the stress in my life and get plenty of sleep, I called it quits (for now) on this project and moved on.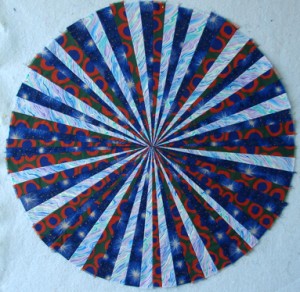
Here’s this quilt’s story so far:
When I first saw the challenge I thought “ah ha, I’ll whip up a patchwork banner for my blog” — after all, the name is a contraction of Quilt Universe, so a banner to go across the top of my page would suit the challenge. But before I even came up with a plan I found a few lines of the Beatles song “Across the Universe” running through my head. “Pools of sorrow, waves of joy, on and on, across the universe.” Eventually it occurred to me to look up the lyrics, and sure enough, I’d remembered it wrong. I had the lines out of order. I debated for about 5 seconds whether to adjust my quilt plan, but I’d already cut fabric, so I said F-k it, this quilt is inspired by MY version of the song. Hence its title – Remix.
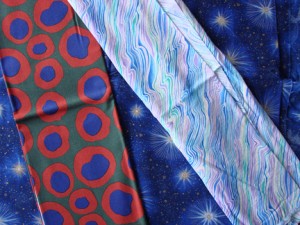 When thinking about how to portray pools of sorrow and waves of joy going on and on across the universe, I realized I’d better use fabric choice to portray the pools, waves, and universe. The universe part was easy to find, then after considering several other possibilities I found the fish-lips fabric for pools of joy. The waves of joy were more difficult. I found the perfect fabric but had already layered and quilted part of it. I finally found another choice, although I would have picked something more colorful if I’d had it.
NOW it occurs to me I could have finished quilting that perfect FQ, then appliqued the other rays over the top, bound it and been done. Why do I always try to do things the hard way?
To portray going “on and on” I realized I needed a vanishing-point. Okay, that means wedge shapes with points in the center. (In hindsight, the point part could have been off the side of the quilt somewhere.) Without much further thought, I layered my three fabrics and cut random wedges. Later I wished I had made them wider – it would have saved several steps in the sewing process. Not to mention a little less fabric pile-up in the seams.
I didn’t stop to think about overall size either. 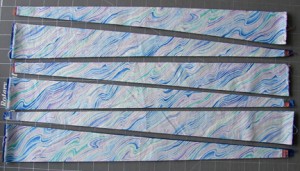 My sorrow and joy fabrics were about 18 inches wide, so I made the wedges 18 inches long. Easy to cut. Not so easy to sew, because it turned out I needed a lot of wedges. I even had a Plan B in case I ran short of wedges (having cut up all my joy and sorrow fabric) but didn’t need it. In fact, I have some wedges left over.
I decided after sewing two wedges together that I needed to trim them a little bit if I was going to have points in the middle instead of a hole with ragged edges. 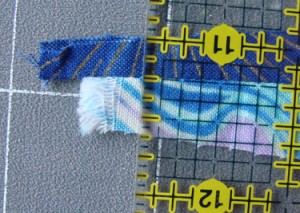 I should have cut the original wedges with a narrow end a bit less than half an inch, but my carefree cutting style wasn’t that careful. So I trimmed them and then sewed the double units together to make 4-wedge units, then those into 8-wedge units. By then I already had a seam pile-up problem, but what was there to do but soldier on? After some careful trimming, that is.
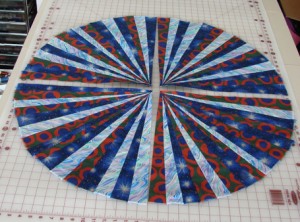 At that point I laid them out on my big table to see if I had enough to make a circle. Yup – and then some. I trimmed a little bit here and there, being careful not to trim too much. I also made sure the future seams did not have the same fabric on both sides. Then I sewed the 8s together into four quarter-circle segments.
By then there was some serious steam ironing going on, and some trimming of excess fabric on the backs of the points, but it still built up. 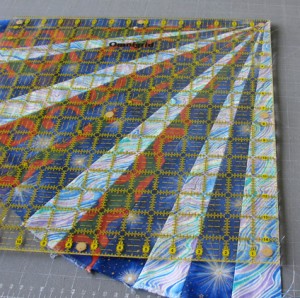 I trimmed each section to just over 90degrees, using my biggest square ruler. Then sewed two quarter sections together so I had two halves.
Now I made sure each half had a straight line for the last seam. Here’s where I screwed up a hair – I trimmed the center too close. I don’t know if you can see it but there is a bit of “horizon line” in the very center.
The center also has a dense lump of many layers of fabric. I’m surprised my sewing machine even stitched through it all. And it would have looked better to have the points end a hair shy of the very center than get cut off by a hair. Did I mention I ironed all the seams open? I find that usually works well when you have many points coming together in the middle. But it isn’t enough to deal with however many seams this thing has in the middle! After that last seam I couldn’t open the center at all, steam or no steam.
I did get this portion spray-basted to batting with a layer of interfacing behind it. Next up is add the background around it. After quilting I will add a ring around the rays to cover the raw edges, and it still needs a backing. That was too much to face on Saturday. Now I’m working on a few other projects that I want to finish before the end of the month.

LOVE reading the story behind your quilt! or almost quilt. It’s not a big deal if you don’t finish the challenge in a week – just no prizes this week…but oh well. You were INSPIRED and that’s what the whole point of my challenges are – to INSPIRE! I also often do things the hard way first and figure out an easier way for next time. I learn a lot that way though so I figure it’s all good!
Can’t wait to see the finished piece! Be sure to share it!
Yes…I remember that song. Seems it was great inspiration for you. Your project is lovely…reminds me of a star burst.
Very creative project. I love what you’re doing here.
It is amazing what we will try and then learn from our efforts. Very pretty and meets the representation!